ZoneAlarm, by CheckPoint, produces several computer security packages including ZoneAlarm Free, ZoneAlarm Antivirus, and ZoneAlarm Extreme Security. Though there are differences levels of security options and capability, they are largely the same.
Like other PC firewall products, ZoneAlarm provides both automatic and manual configuration interfaces. By default, ZoneAlarm will automatically prompt you to “Allow” and “Remember this Setting” for Logitech Alert Commander to access the Internet and to act as a server.


Follow these instructions to ensure ZoneAlarm does not interfere with the operation of Commander.
1. Open the ZoneAlarm control center either from the Start menu or by right- clicking on the ZoneAlarm icon in the Windows system tray.
2. Click on Firewall in the left navigation panel. The “Main” screen displays.
3. The default setting for Internet Security Zone and Trusted Server Zone is “Medium.”

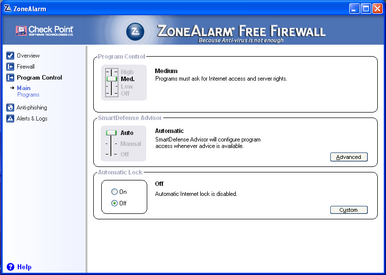
4. Click the Program Control option. The “Main” screen displays.
5. Set the Program Control level to “Medium.”

6. Click on the “Programs” option. A list of programs requesting “allowance requests” displays. Validate that all of the Logitech Alert Commander “allowance requests” are set to “Auto”.

7. If you do NOT find the Logitech Alert Commander, Logitech Installer, or Logitech Updater listed as a program, you will need to click the ADD button to manually add them. In the Add Program dialog, enter the path to the Commander, which by default is “c:Program FilesLogitechLogitech AlertLogitech Alert Commander.exe”. Click Open and repeat the prior step.
You have now successfully configured ZoneAlarm, but remember that you may have more than one firewall application running on your PC. You need to disable or configure each one.
Finally, you may need to exit the Commander (from the task icon) and restart for the changes to take effect.